第一步: 搭建Web服务器环境
搭建Web服务器环境(新手建议用环境集成包,如:phpstudy、xampp、宝塔等来安装环境),环境配置可参考此贴:https://www.shopwind.net/forum/thread/104.html
第二步:下载源码并且上传
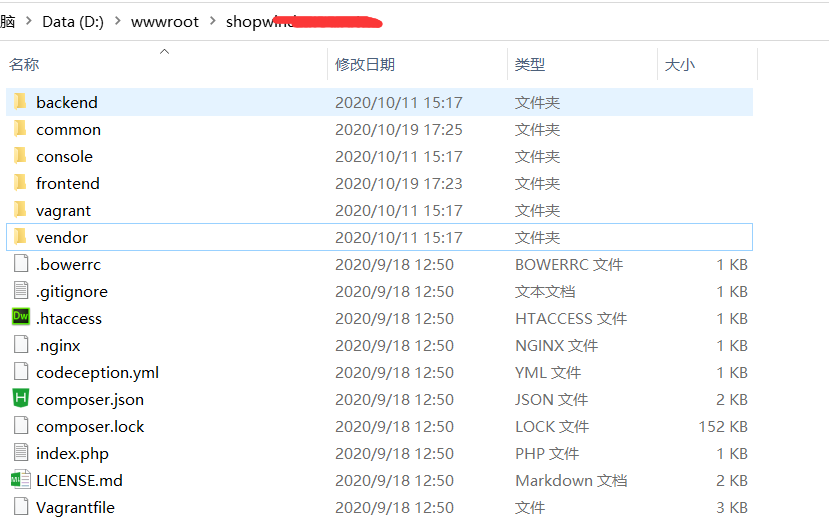
点此链接:https://www.shopwind.net/product/download.html 下载最新版系统源码,将下载好的源代码上传到根目录(一般默认wwwroot文件夹)。 如下图:
第三步:设置站点运行目录
需将站点运行目录设置为网站文件的子目录的frontend/web文件夹
第四步:设置伪静态
Apache服务器伪静态代码:
<IfModule mod_rewrite.c>
Options +FollowSymLinks
IndexIgnore */*

RewriteEngine on

# if $showScriptName is false in UrlManager, do not allow accessing URLs with script name
RewriteRule ^index.php/ - [L,R=404]

# if a directory or a file exists, use it directly
RewriteCond %{REQUEST_FILENAME} !-f
RewriteCond %{REQUEST_FILENAME} !-d

# otherwise forward it to index.php
RewriteRule . index.php

RewriteRule \.svn\/ /404.html
RewriteRule \.git\/ /404.html
</IfModule>
nginx服务器伪静态代码:
location / {
  #Redirect everything that isn't a real file to index.php
  try_files $uri $uri/ /index.php$is_args$args;
}
#If you want a single domain name at the front and back ends
location /admin {
  try_files $uri $uri/ /admin/index.php$is_args$args;
}
location /mobile {
  try_files $uri $uri/ /mobile/index.php$is_args$args;
}第五步:执行安装流程
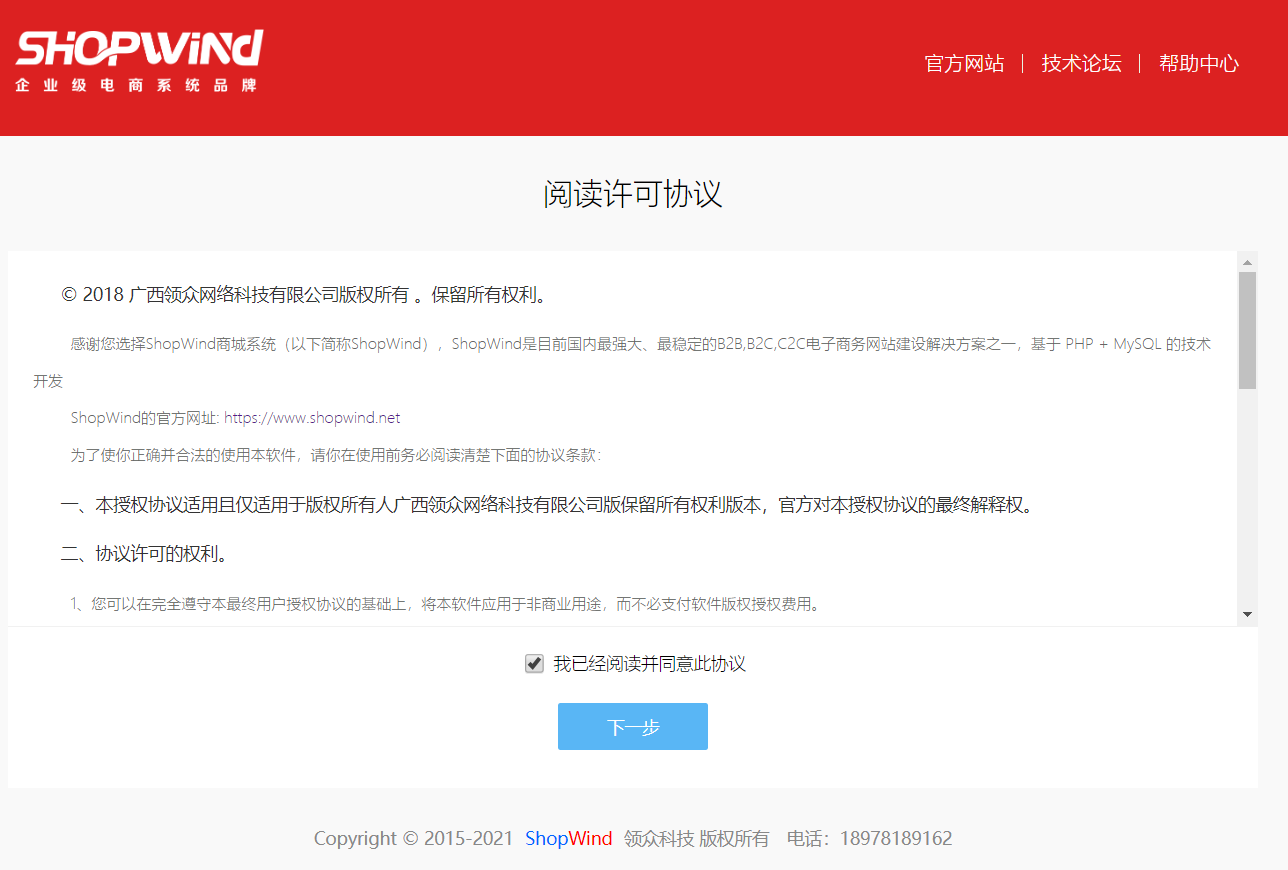
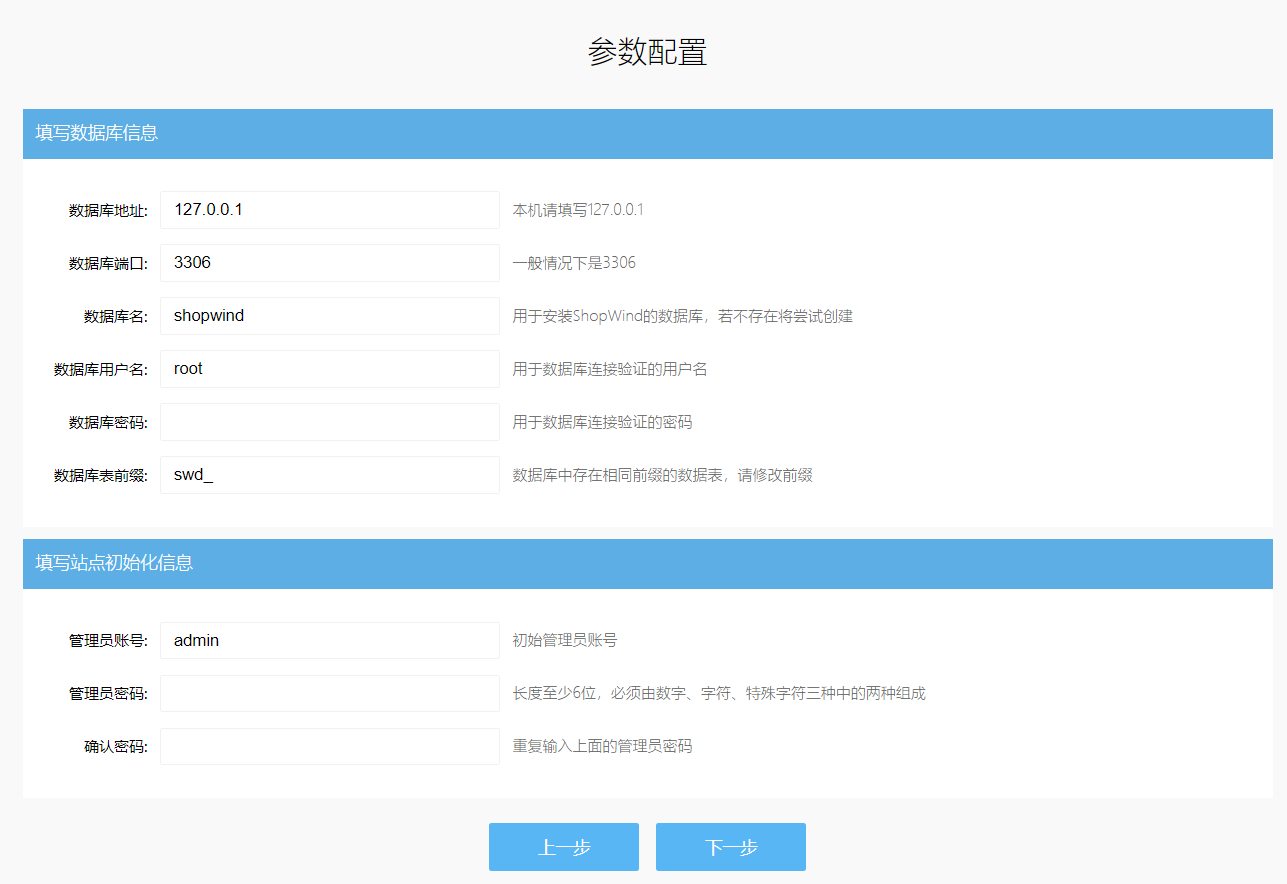
浏览器中输入站点域名,引导安装,直至安装完成。
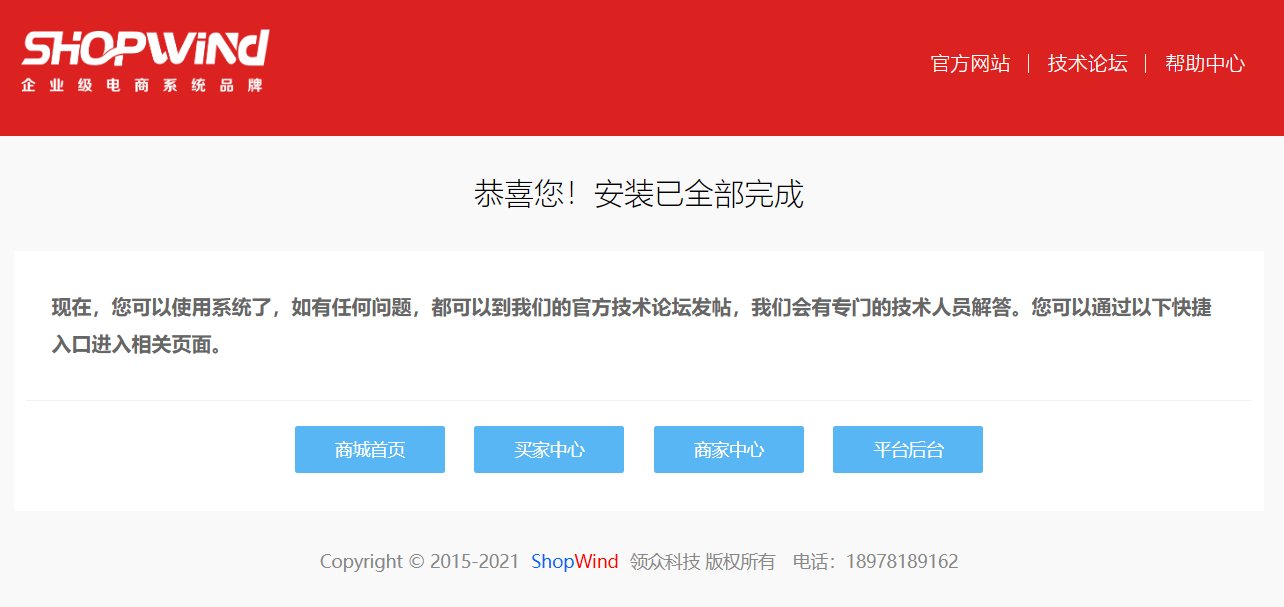
平台后台入口:域名/admin
商家管理入口:域名/seller/login.html
*系统安装完之后,会自动创建两个测试账户,一个是卖家账号(seller 123456),一个是买家账户(buyer 123456)
如果想再次安装,请删除以下文件后,访问安装页面即可。
wwwroot(根目录)/ frontend/web/data/install.lock
wwwroot(根目录)/ frontend/web/data/ initdata.lock